my toe
I've been meaning to write about "my toe" but haven't gotten a round tuit for a while. If you've been reading my blog long, you may remember another version, but this is the latest.
One of my Sisters Of the Wool wanted to try "my toe" this week, and though I had given her some guidance, it was a some time back and her notes were not complete, so here goes...
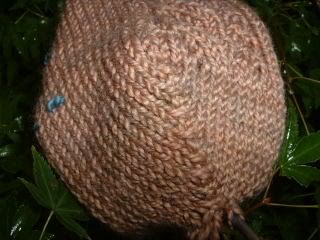
This toe works well for top-down socks, and for after-thought heels. The look reminds me of the line you get with short row heels, but with absolutely no holes. I like the look better than the traditional toe decreases, but that's personal preference.
Basically, the idea is to decrease at each side of the toe area. On every row. On one row, it's ssk and on the next row, it's k2tog. And the decreases share the center stitch.
When you are nearing the point on your sock where you want to start the toe decreases, (it's the middle of my little toe, for me), place markers just before the center stitch on each side of the foot. For example if you have 60 stitches in your sock, there will be 30 stitches between each marker.
Round 1: *Knit until 2 stitches before the marker. ssk slip marker * Repeat from * to *.
Round 2: *Knit until 1 stitch before the marker. Slip the stitch (purlwise) to the right needle Remove the marker. Slip the stitch back to the left needle (purlwise). k2tog Place marker. * Repeat from * to *.
[This stitch slipping is to get the marker out of the way because you are knitting the stitch just before the marker together with the stitch just after the marker.]
Stitch arrangement hints: If I'm using dpns, I arrange the stitches on 4 dpns, with about a quarter of the stitches on each needle, and the markers are at the center point of those dpns. If I had 60 stitches going down the leg, I would have 16 stitches on each of the dpns that had markers and 14 on the other two dpns. After a while, some stitch shifting would be necessary due to consuming the stitches on the dpns with markers. If magic looping, I would rearrange the stitches so that there were 30 stitches on each but the "gaps" are at the middle of the top of the foot and the middle of the bottom of the foot. The same idea would work for you two circ knitters too, I expect, though I don't have personal experience there.
I do these decreases decribed above until I've decreased away about half of the stitches I'm going to decrease. For instance, if my sock had 60 stitches, and I were going to decrease down to 20, I would do the decreases above until I was down to 40. Or 36. I determine the switch over point by trying the sock on. At the point where I decide the sock is close to long enough and I better hurry up these decreases, (when I try it on and there are just the ends of a couple toes sticking out) I switch to double decreases every row. Switching to double decreases at the end gives a nice round toe.
Double decrease round (every round): * Knit until two stitches before the marker. Slip one stitch knitwise. Slip the next stitch purlwise. Remove marker. Slip the stitch back, purlwise. k2tog. Pass the first slipped stitch over. Place marker. Repeat from *.
Stop decreasing when the sock is long enough and you are down to the number of stitches you like. Close the toe with kitchener stitch. Or three needle bind-off. Or however you like to close toes.
Please let me know if this decription is clear. And if you use "my toe", please send a picture or a link.
"my toe" copyright 2007 jdb soapquiltknit
Feel free to use "my toe" in your socks, or your sock patterns, with credit please.
Labels: socks toe
posted by Jeri at 9:02 PM
![]()


0 Comments:
Post a Comment
<< Home